superstar vandermeulen 300

Edward Vandermeulen`s Super Star

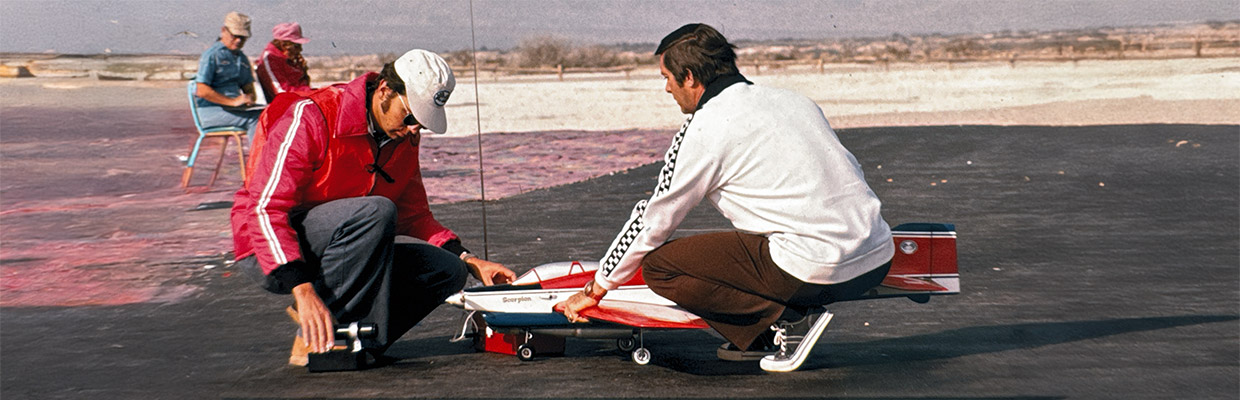
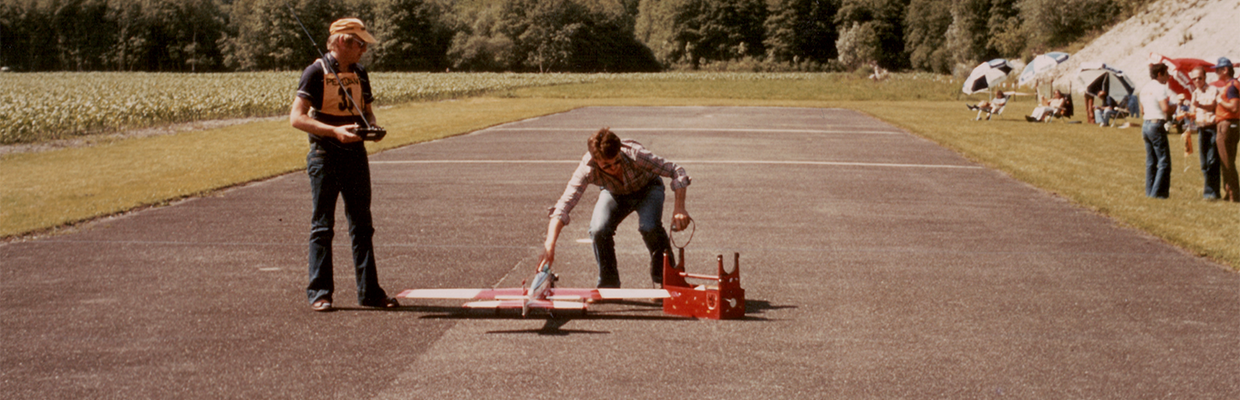
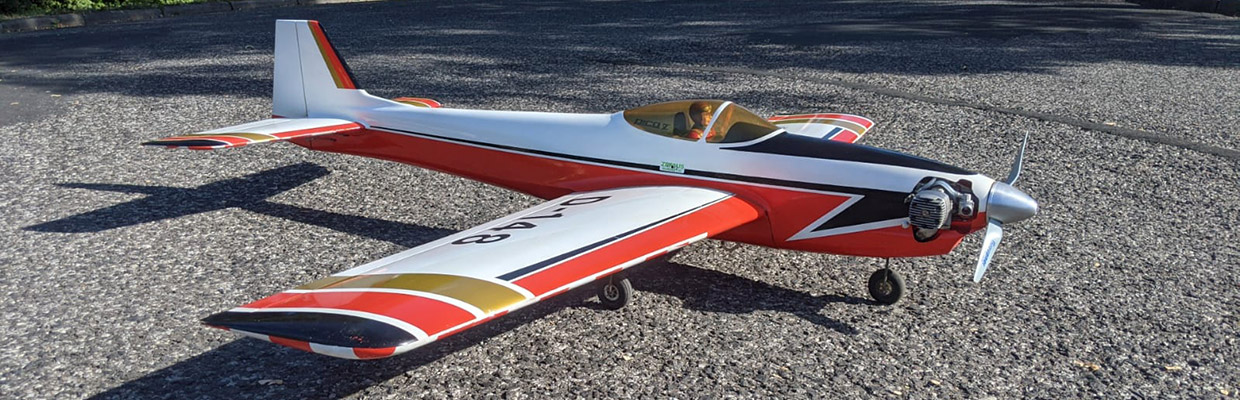
Last week, our Belgian friend Edward Vandermeulen sent me photos of his latest creation, his Super Star. In 1971, Edward competed in the World Championships in Doylestown, USA, as a member of the Belgian F3A national team. His warhorse at the time was a replica of Wolfgang Matt’s Super Star. By the way, Edward is now 79 years old.

In his old age, he decided to build the same Super Star again, but this time with an electric motor. Here is the result:

superstar vandermeulen 01

SUPER STAR is an aerobatic radio controlled model designed specifically for best performance in the F.A.I. aerobatic schedule. The shape and construction of this model hides innumerable compromises, essential for best all-round performance.

superstar vandermeulen 1971

Since the model is designed for out-and-out performance, I do not recommend Super Star as a beginners’ model, although this machine can be flown over a wide speed range, while still maintaining positive control.

doylestown 1971 63

Despite its remarkable all-out aerobatic ability, you will be astonished at Super Star’s ability to fly perfectly satisfactorily without aileron control, using just rudder, elevator and throttle controls, the only modification necessary to fly in this mode being to increase the dihedral angle to +7 degrees.

1971logo

Super Star has been flown successfully using a wide range of 10 c.c. power plants, including the Rossi 60, Webra 61, Enya 60 and Super Tigre 60 RV etc.

Now for the construction notes, which are limited to the essential points of construction, since I feel that anyone attempting this type of model can reasonably be presumed to have the necessary building ability to complete this model without much prompting.

superstar vandermeulen 02

Fuselage

Prepare the fuselage sides on a flat building board, making sure that you are building two opposite sides — not two identical! Follow the construction sketch on the plan, adding the top and bottom triangular longerons, wing seat doublers, and filling blocks at the nose including the engine bearers to make up two basic fuselage side structures ready for joining.

superstar vandermeulen 03

Naturally, every model builder has his own constructional techniques. To ensure true alignment, I assemble the fuselage directly over the plan, which I cover with plastic sheet. An alternative method is to draw the plan view of the fuselage on the building board and assemble the fuselage over this.

superstar vandermeulen 04

Assemble the fuselage over the plan upside down, laying the fuselage top deck on the board and gluing the fuselage sides to it.

joker
Use right angle to true up the sides and clamps to hold them against the formers.

superstar vandermeulen 05

While this assembly is drying, construction can be taken a stage further by adding the fuselage underside sheet, grain across the fuselage for strength.

komet
At the nose, filling blocks are then added and finally the ply floor.

superstar vandermeulen 06

When all glue has set, remove the assembly from the building board and add the remaining filler blocks at the front of the fuselage top deck.

superstar vandermeulen 07

The fuselage is now structurally complete, and the next job is to shape it to the sections shown on the plan, first drawing the side view outline on to the balsa and shaping to this line. The fuselage is then rounded off, preferably using an electric drill and sanding disc, then finally hand sanded to finish.

superstar vandermeulen 08

Wing

The wing is best built in one piece using two perfectly true building boards set to the correct dihedral angle.

superstar vandermeulen 09

It can be built in two separate halves and eventually joined using the dihedral brace, but the one piece method is to be preferred.

superstar vandermeulen 10

Prepare two sets of wing ribs using the ‘sandwich method’ as shown on the plan, cutting rib blanks, assembling as a block and carve and sand to shape using the root and tip templates.

superstar vandermeulen 11

Next, make up the main spars using medium hard wood, with the spar doublers in the centre, pin the two lower main spars on the board and then position the wing ribs.

superstar vandermeulen 12

Align the ribs using a purpose cut jig sheet placed under the ribs just ahead of the leading edge.

superstar vandermeulen 13

Cement all ribs and then add the leading and trailing edge spars.

superstar vandermeulen 14

The jig pieces incidentally are cut in half span lengths and cut to shape, but transferring the board-to-rib rises at root and tip to the jig sheet and cutting the jig sheet to shape along the line joining the rise points.

superstar vandermeulen 15

This correctly aligns the ribs and compensates for the wing taper.

superstar vandermeulen 16

Add the top ply spar braces and, when the structure is dry, begin to add the top surface sheeting.

superstar vandermeulen 17

The plan shows a partially sheeted wing structure with cap strips to the ribs where sheeting is not shown.

superstar vandermeulen 18

For those who prefer it, however, the wing can be fully sheeted.

superstar vandermeulen 19

When all top surface sheeting is complete, leave the structure to dry thoroughly.

superstar vandermeulen 20

The next step is to remove the structure from the building board and add there maining ply centre section braces.

superstar vandermeulen 21

Then add the front centre rib strengtheners around the wing locating dowel.

superstar vandermeulen 22

Finally, complete the undersurf ace sheeting, add the wing tip blocks and sand to a final shape.

superstar vandermeulen 23a

Tailplane

The structure shown for the Super Star tailplane is one that has been popular for many years, and little comment on construction is required, except perhaps to add that an alternative method would be to use a foam core arrangement.

superstar vandermeulen 24

Finish

Finishing a model is a subject in itself, and every modeller has his own personal technique.

superstar vandermeulen 25

I would only advise an initial covering of the fuselage framework with tissue or silk to harden off the surface.

superstar vandermeulen 26

A few words about test flying

First, and most important, ensure that any model balances correctly.

superstar vandermeulen 27

Switch on your radio and check that all control surfaces centre correctly and that the strip ailerons have equal throw.

superstar vandermeulen 28

The most important part of trimming concerns loops and outside loops.

superstar vandermeulen 29

In the case of the inside loop, if there is a tendency for one wing to drop, the wing should be balanced, with weight in the lighter tip.

superstar vandermeulen 30

Screwing out of outside loops is corrected with engine thrust line adjustments, usually about 1.5 degrees one side or the other to compensate.

superstar vandermeulen 31

That’s about it as far as Super Star goes. It’s a good machine and you should have fun with it. Build more than one!

superstar vandermeulen 32

Specifications

Wingspan: 1,60Meter
Lenght: 1,34 Meter
Flying weight: 3300 Gramm
Power: Electric Pichler Boost 60

superstar vandermeulen 33

superstar vandermeulen 34

doylestown 1971 63
Edward Vandermeulen together with his team manager 1971 in Doylestown
simprop catalogue
Simprop catalogue
superstar vandermeulen 36
Super Star drawing
doylestown 1971 04
Wolfgang Matt 1971 in Doylestown


Pictures: Edward Vandermeulen
Text: Edward Vandermeulen, Wolfgang Matt

Leave a Reply

Your email address will not be published. Required fields are marked *